Redesigned Logo
September 10, 2017Image Preparation
If you aren’t sure about how to prepare your files for submission these quick instructions will set you on the right path. We have included both of Adobe’s most popular tools for photographers. Other software may have different instructions but the basic settings will be the same.
Photoshop
To create a new file with the correct sizing click File > New on the menu and create a file with the following parameters (see the image below for a sample):
- 11 x 14 inches
- 250 dpi
- CYMK is the preferred color space for printing
To export the final files go to the menu and choose File > Export > Export As… and make sure you choose jpg or tif and do not scale or lower the quality (also see image for a sample).

Lightroom
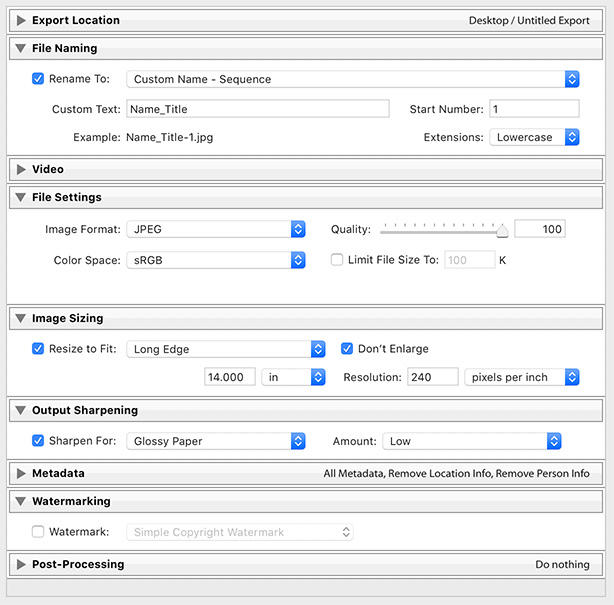
To export your images from Lightroom choose File > Export… from the menu. In the export popup choose the following settings (see settings in sample below):
- File Naming
- choose Custom Name – Sequence and make sure to use your name and title of the submission.
- File Settings
- Choose JPEG for Image Format and make sure quality is set to 100
- Image Sizing
- Check Resize to Fit and choose Long Edge from the drop down
- Set the size to 14 and select inches from the drop down
- Set Resolution to 250 pixels per inch
- Sharpening (Optional)
- If you use this setting make sure you select Glossy Paper and set it to Low


